Change DNS
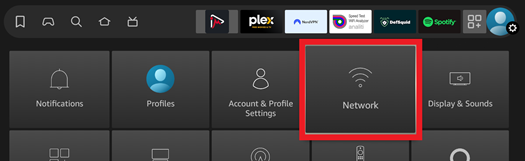
Select Firestick Settings
![]()
Select Network
Highlight your Wi-Fi Name and press the Play/Pause button on the remote
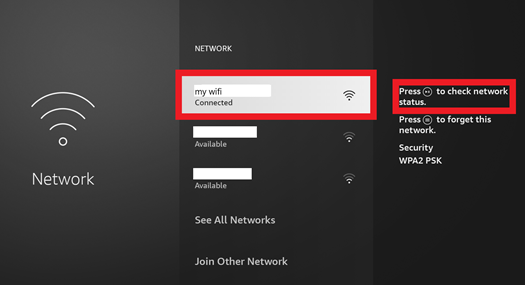
Choose Advanced

Take a picture of this screen or record your IPv4 address and Gateway address

Press back on the remote twice to get back to the Network screen
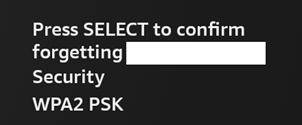
Press the menu button on the remote to forget this network
Then press SELECT (middle button) on the remote to confirm

Select your network again
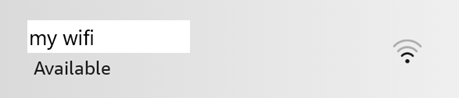
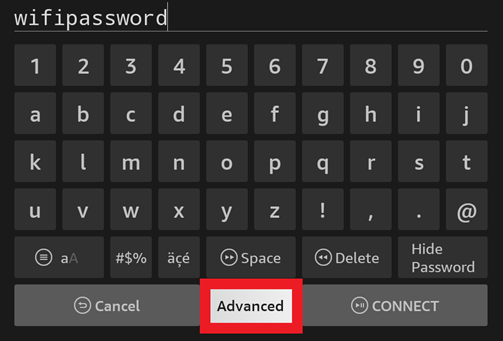
Enter your Wi-Fi password and select Advanced (NOT CONNECT)
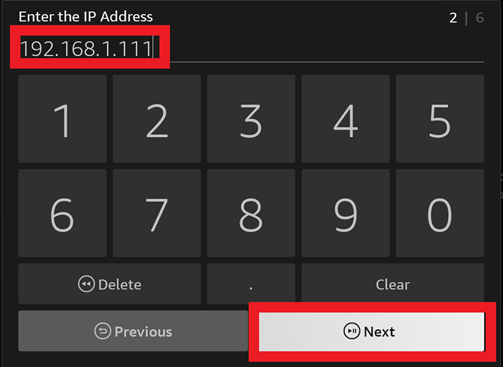
Enter your IP address from your picture or that you recorded earlier
Press Next
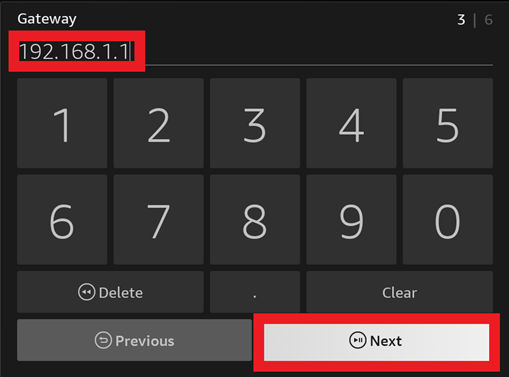
Enter your Gateway from your picture or that you recorded earlier
Press Next
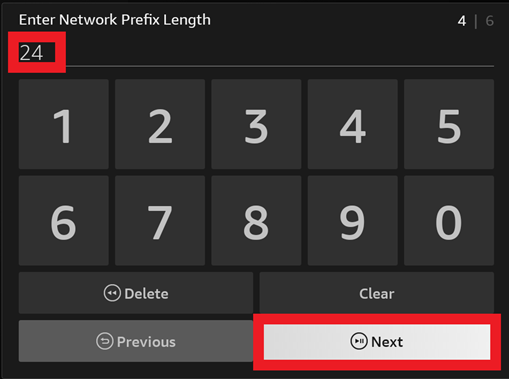
Enter 24 for Network Prefix Length
Press Next
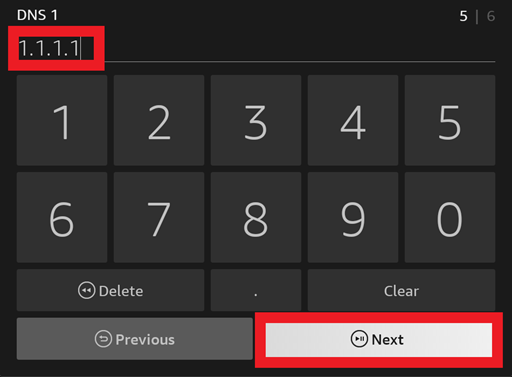
Enter 1.1.1.1 for DNS 1
Press Next
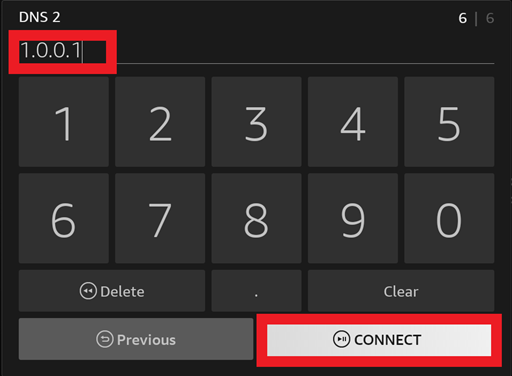
Enter 1.0.0.1 for DNS 2
Press CONNECT
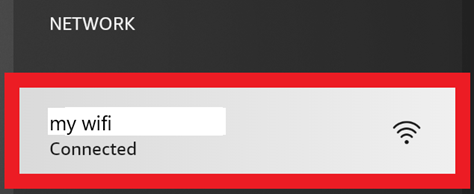
You should see your Wi-Fi name as Connected
Press Home on the remote to go back to the main screen
Reboot your firestick
On the remote - Hold the Play/Pause button and the middle button on the direction pad until the Firestick starts rebooting.